Have you ever wanted to make a virtual reality app?
The technology of VR (Virtual Reality) is now widely applied in various industries beyond its simple gaming purpose. Everything from job training, to architectural design work, to education, and more are making use of this innovation. VR can create immersive environments that can entertain and educate the users and even allow users to interact with each other! But there are still quite a few challenges making a VR application deemed difficult among developers.
However, what if there was a way to make a VR app without needing to know everything there is to know about coding? Well, fortunately, this is not only possible but accessible to just about every developer. So, if you’ve dreamed of making your own virtual reality experience, let us introduce you to the wonderful world of Unity’s XR Interaction Toolkit!
Table of contents
MAKING INTERACTIVE VR/AR APP IS CHALLENGING. WHY?
First of all, there is no “standard” VR device yet. Different vendors make different VR devices. This makes each controller somewhat different than the other, resulting in the need for an input system that recognizes each device’s unique button layout. Secondly, implementing interaction is quite challenging as it requires a different approach to the typical process for a desktop app or a mobile app interface. Imagine you’re playing a first-person shooter in VR, but you still have to press a button on a controller to pick up a new weapon. You might think, ‘Isn’t there a better way to make this pick-up action more intuitive?’, or, ‘What if I could interact with objects using hand gestures?’.
Luckily, Unity provides a set of device controls to access user input on any VR platform, as well as a powerful framework that can easily implement VR interactions. This is called The XR Interaction Toolkit, which allows Unity input events usable for 3D and UI interactions.
Did you come across any errors in this tutorial? Please let us know by completing this form and we’ll look into it!

FINAL DAYS: Unlock coding courses in Unity, Godot, Unreal, Python and more.
UNITY’S XR INTERACTION TOOLKIT
The package allows us to add interactivity to our VR apps by simply dropping components into the Scene view. These interactions include teleporting, movement, turning, picking up objects, hand gestures, and most commonly used VR development interactions. The best part is that it all comes with a few clicks of installing packages, so it can even be applied to existing projects to support XR platforms and expand further smoothly.
So if you’ve ever wanted to develop a VR experience in Unity but were unsure where to start from, follow the guide in this tutorial to set up the toolkit and make your app interactive in VR without deploying a single line of code!
Note: This blog post introduces some of the concepts introduced in Daniel Buckley’s course, Discover the XR Interaction Toolkit for VR. To get a full overview of the XR Interaction Toolkit, I strongly recommend you to check out the course.
PREREQUISITES
In this blog post, we’ll explore how to set up the Unity XR Interaction Toolkit using Oculus Quest 2.
You’ll need to have a working Oculus VR headset connected to your computer over a USB cable to get started.
- If you have an Oculus VR Headset, go to this Oculus Developer Support page and follow the setup guide.
- If you’re using other devices such as GearVR, GoogleVR, or OpenVR, you’ll need to follow this guideline for Third-party supported platforms.
- And if you don’t have any VR headset, don’t worry– you can use this guide: Quickstart for Google Cardboard for Unity and turn your smartphone into a VR headset.
Have you finished setting up your VR device, and is the device plugged into your computer? Then let’s move on to the next section!
INSTALLING ANDROID BUILD SUPPORT MODULE
First of all, you’ll need to have Unity 2020.1.0f1 or above, with the Android Build Support module installed.
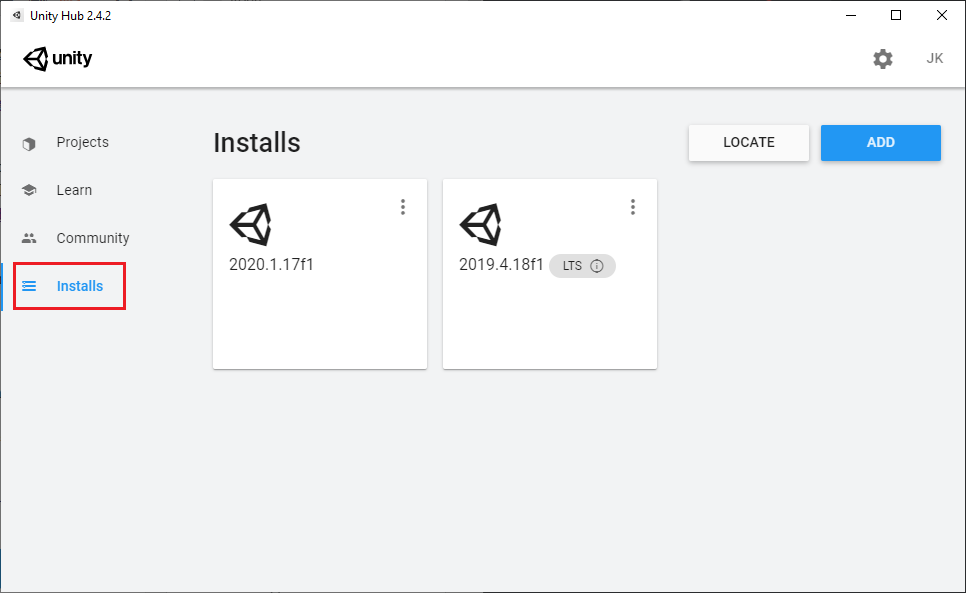
To install the module, open up Unity Hub and click the Installs tab.
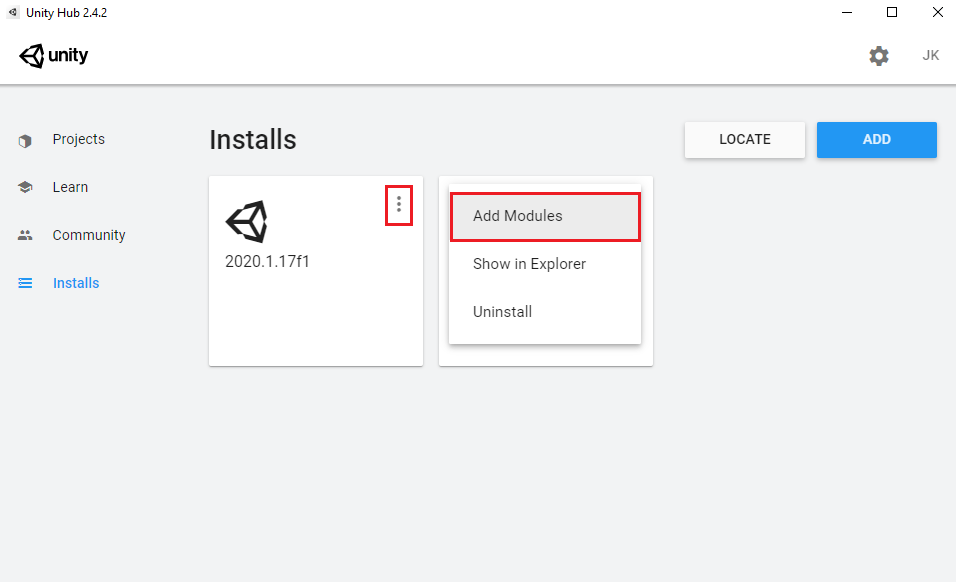
Then, you can click the three dots next to Unity 2020.1.0f1 or above and click Add Modules.
In the Add Modules window, select the Android Build Support module (including its sub-modules) and click Next.
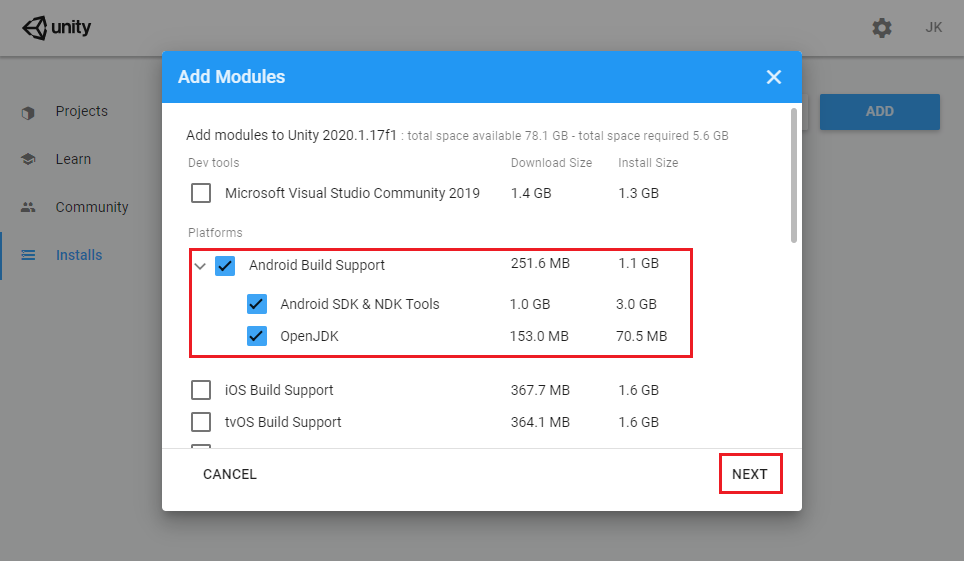
If you agree with the terms and conditions, click Done!
You can now create a new Unity project and test it out on your VR device. In fact, we have already set up this sample project here so that you don’t need to do anything else to get started.
That said, if you’re using a brand new project, you may want to read the next section carefully, but if you’re using the sample project, then you may skip the next section and continue reading the XR Rig section.
INSTALLING THE XR INTERACTION TOOLKIT
*Note: As of 02/02/2021, the XR Interaction Toolkit package is still in a preview state and is only compatible with Unity 2019.3 and later. The features introduced here may change until it is ready for a stable release.
To install the toolkit, we need to open up the Package Manager by clicking on Window > Package Manager.
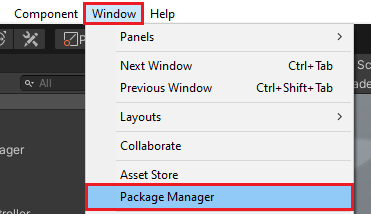
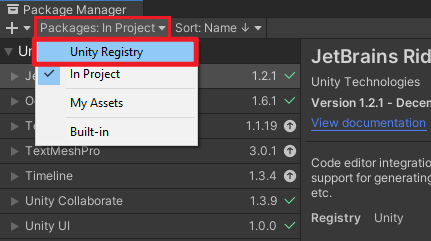
This is basically a window where we can download extra packages for Unity. At the top left, click on where it says Packages: In Project and choose Unity Registry.
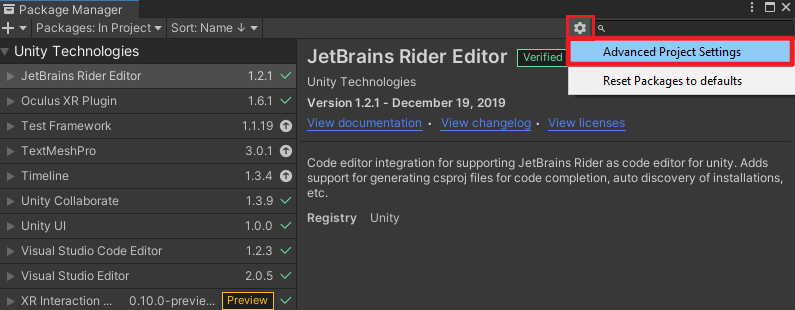
It will then list all the available packages that we can install on top of our existing engine. To see preview packages, click on the Gear icon at the top right, and select Advanced Project Settings.
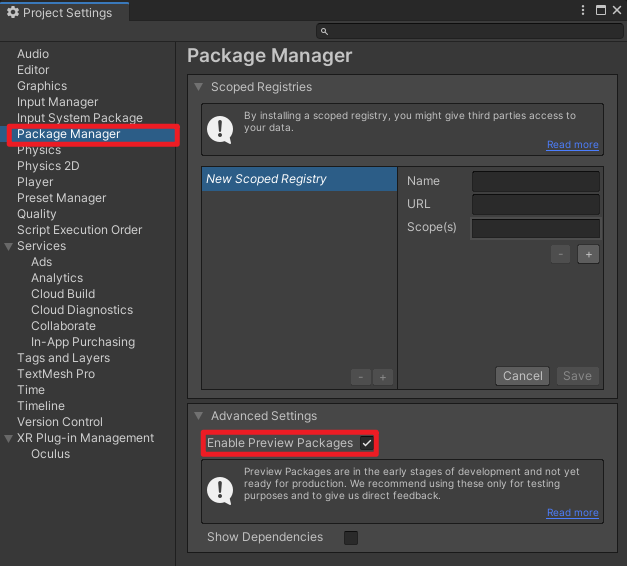
Inside of the Package Manager window, click on Enable Preview Packages.
Now the preview packages should be listed in the Package Manager. Select XR Interaction Toolkit and click on Install.
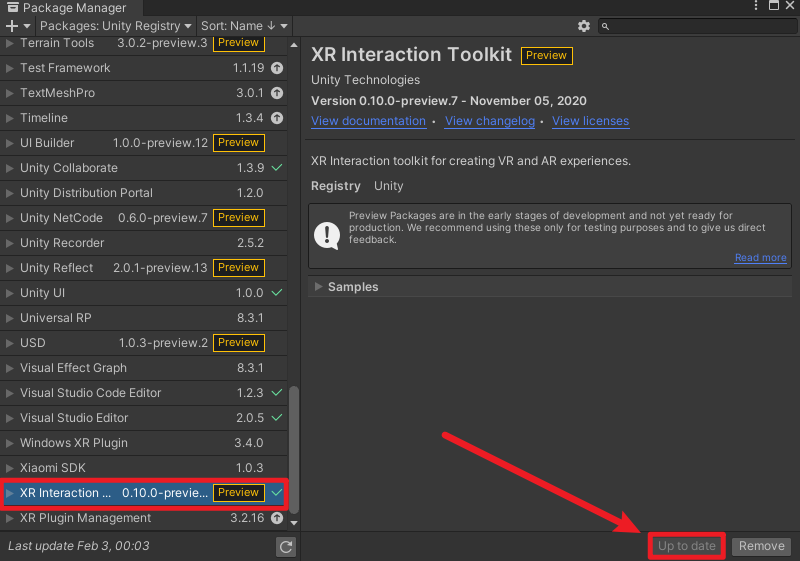
Once the download has been completed, this pop-up window will warn us that the package will require a restart. Click on Yes, and the project will reopen with the XR Interaction Toolkit installed.
We also need to install the XR Plugin Management Package to build our app on all the various XR devices, such as Oculus Rift, Vive, Index, etc.
(As the package is still in a preview state, you may encounter an error with the latest version. If that’s the case, you can always click on the arrow next to the package name and downgrade it to the previous version (3.2.16).
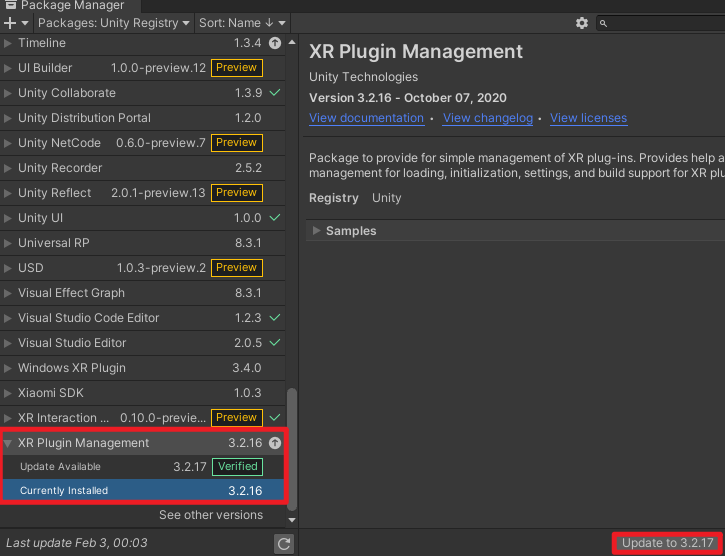
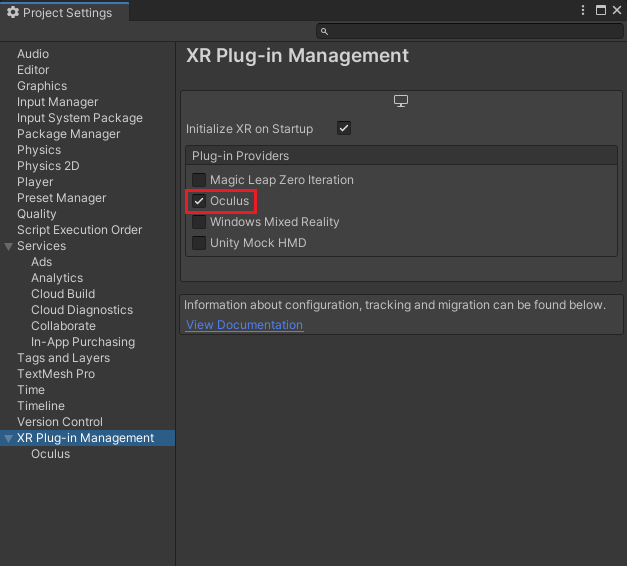
Once the XR Interaction Toolkit and the XR Plugin Management package are installed, we can enable the Plug-in Provider (Oculus) in the Project Settings window.
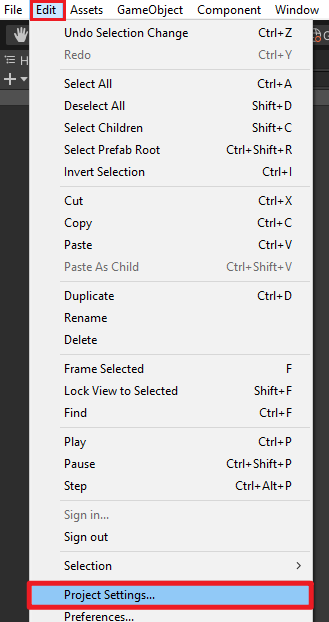
If your device isn’t on the list, you might need to install your device’s specific plug-in provider from Package Manager.
OCULUS QUEST 2 SETUP
Most VR headsets automatically recognize Unity Editor and work in Play mode straight after they’re connected to your PC. But there’s a bit more of a setup required when setting up the Oculus Quest 2.
First of all, you need to download and open up the Oculus Software. The connected device should appear in the Device tab. If it doesn’t appear, you need to click on Add Headset and manually configure it.
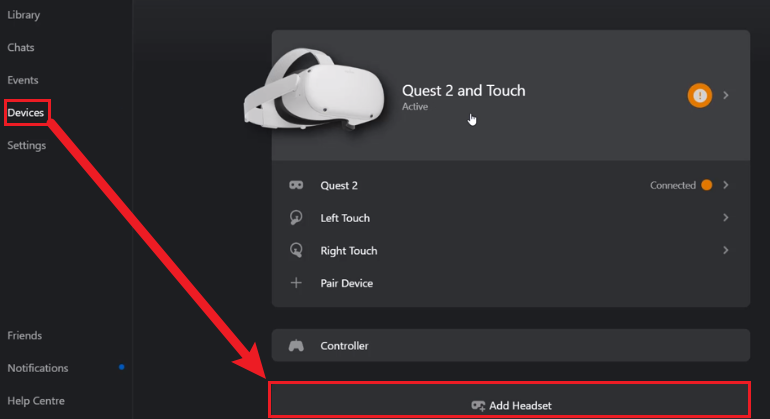
Now, if you click on the Play button inside of Unity, you’ll be able to see a pop-up message in the headset asking whether you want to enable Oculus Link. Once you have enabled that, you can start previewing the game on your Oculus Quest 2 headset.
PLAYTESTING IN VR
Now, if you open up the SampleScene in the project, you should be able to press Play and look around inside of your VR headset!
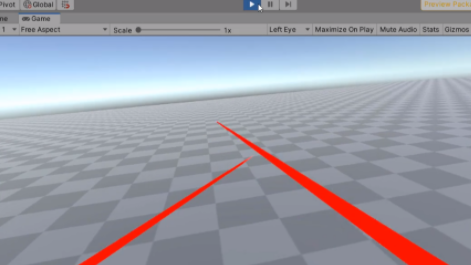
But what is it exactly that enables this feature? The scene contains two main components derived from the packages installed: XR Interaction Manager and XR Rig.
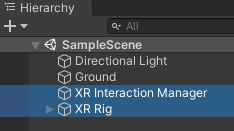
The XR Interaction Manager provides everything we need to access user inputs, including hands, controllers, and voice commands. There is nothing you need to touch here, as the script will handle all of its functionality.
XR RIG
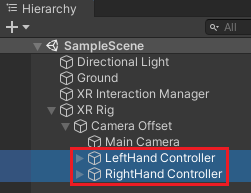
Let’s look further into the XR Rig. Click on the arrow next to XR Rig to expose its children’s objects.
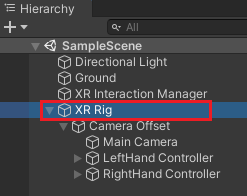
XR Rig is basically the structure of our character in VR, similar to a typical Player GameObject. It defines where we are in 3D space, where our head is (i.e., camera), where our hands are, and how we can then interact and move around in the world.
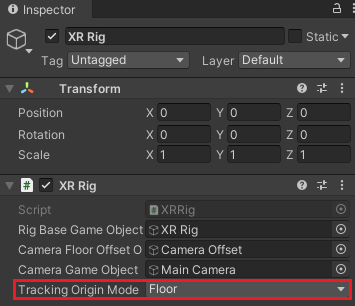
The XR Rig component attached to the object keeps track of all the various GameObjects we need. The Tracking Origin Mode, which is currently set as Floor, sets the starting point to be at your feet, where you set the floor in your headset.
You can also implement moving, turning, and teleportation by adding these components to XR Rig:
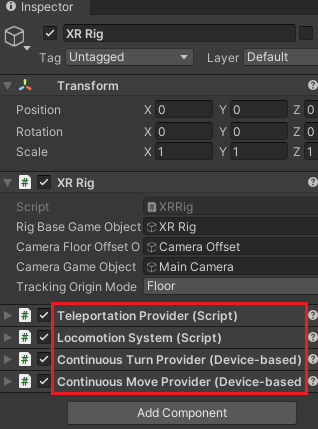
- Teleportation Provider (Script)
- Locomotion System (Script)
- Continuous Turn Provider (Device-based)
- Continuous Move Provider (Device-based)
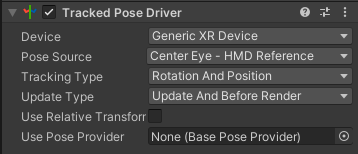
As a child of XR Rig, we have a Camera Offset. This is where our Main Camera is located. The Tracked Pose Driver component attached to the camera allows the camera to move with the headset. With this component, any action that happens through the headset gets applied to the main camera.
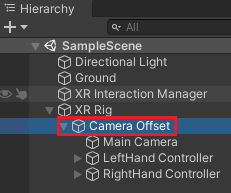
Then we have the LeftHand Controller and RightHand Controller. These hands have the XR Controller (Device-based) component, which is the main component that manages the XR controller.
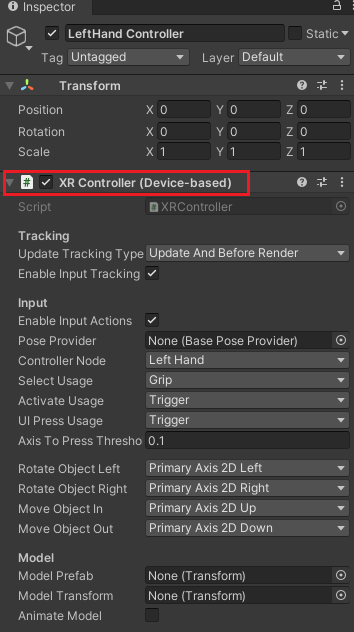
The XR Controller component lets us choose the Input Types, which allows us to select which buttons to press for certain actions. Unity has a library of all the various VR controllers and their button layouts– for example, the Grip button would be the ‘Oculus’ button. For a ‘Vive’ device, though, that would be the Trigger button. The full list of controller XR Input Mappings is available in this documentation.
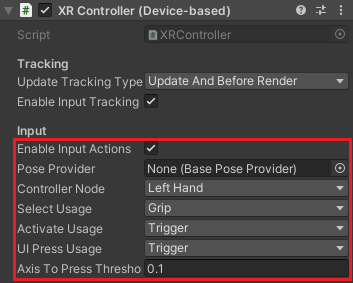
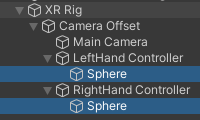
Along with this, you can choose if you want to instantiate a Prefab to the controller (e.g., Hands). We’re currently using a Sphere to act as a simple hand model. Still, if you were to animate your fingers or add particle effects, you may need to remove the sphere and have an actual hand prefab instantiated by the XR Controller component.

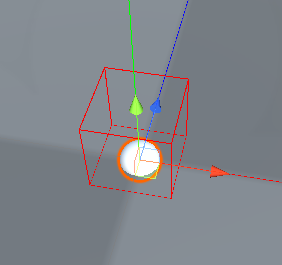
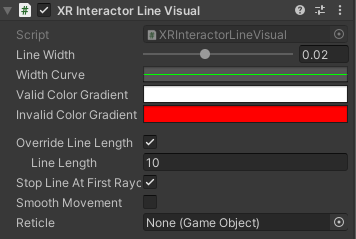
We then have the XR Ray Interactor, which we can use to have a pointer. This means our hands would have a line pointing out from them, which allows us to select, pick up objects and teleport around the world.
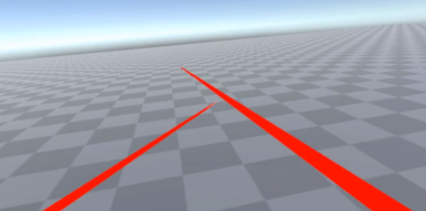
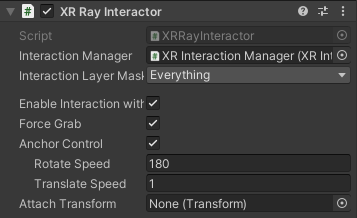
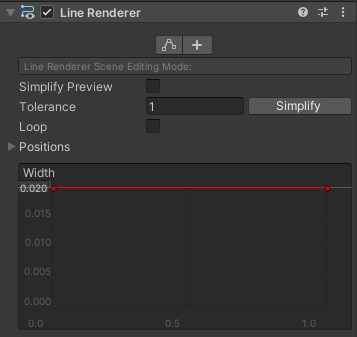
The Line Renderer is used to render the line, and the XR Interactor Line Visual component defines the look of this line.
CONCLUSION
So far, we’ve looked at the XR Interaction Toolkit‘s basic components and how it can be used to implement movement using the XR Rig. Installing and setting it up is fairly straightforward. We can easily add extra features such as teleportation, snap turns, and ray interactor by typing the specific component’s name in the Inspector. With Unity’s XR Interaction Toolkit, you can quickly and easily incorporate interactions into your real-time 3D environments.
If you want to look at more common use cases of XR Interaction Toolkit, check out the links below that demonstrate the system’s functionality with sample assets and behaviors:
- XR Interaction Toolkit Examples (Github)
- Unity3D Manual (Web)
- Zenva’s Free VR & AR Tutorials (Web)
- Discover the XR Interaction Toolkit (Course)
I hope this post helped set up your first VR experience in Unity. See you in the next post!
